Gassendi Crater, a Lunar Favorite
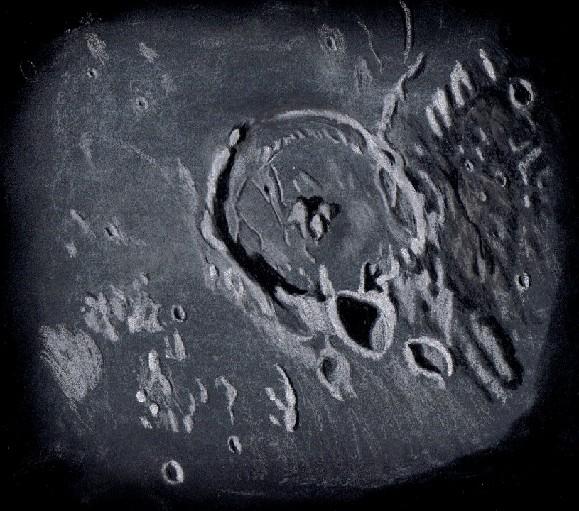
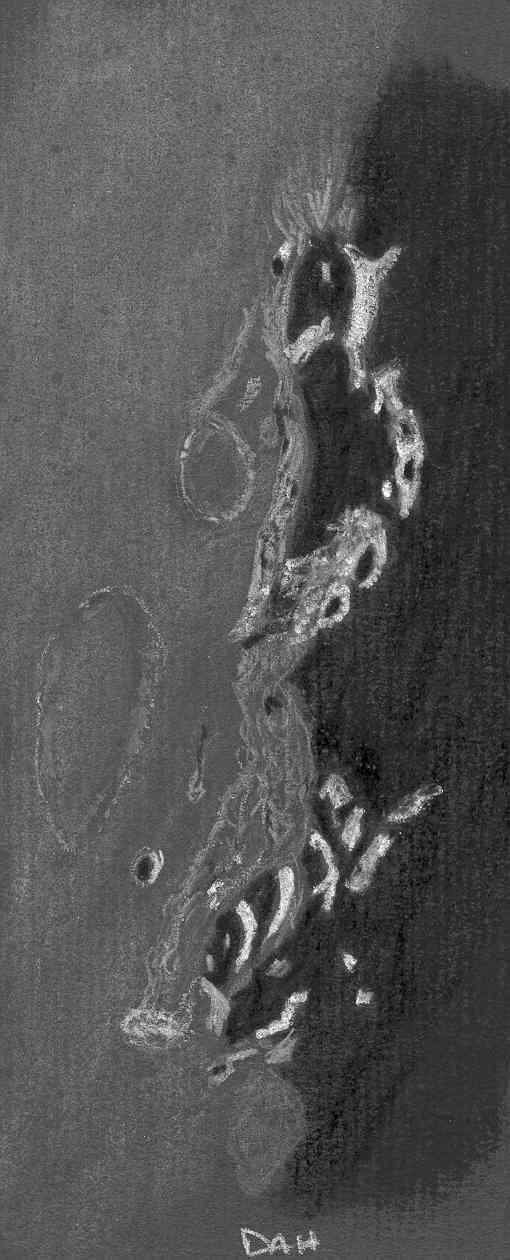
Protruding inside the northern rim of the sea of moisture is the large floor
fractured crater Gassendi. If you close your eyes and try to picture in your mind
a large lunar crater, the image may look something like Gassendi. The 114 km.
walled plain crater is shallow as a result of lava upwelling across the floor
especially toward the east where the highest concentrations of floor fractures are
crisscrossing. The shallow south end is tipped facing the center of Mare Humorum.
The northern end of the crater floor is rubble strewn and hummocky. The eastern
floor sports ridges and small craters in addition to rilles which were clearly
visible in the good seeing of the evening. The southern floor has an irregular
ridge that is parallel to the low rim. The large central peaks (1.2km. high) and
several smaller ones were seen in good relief with sharp black shadows. The deep
crater Gassendi A on the north rim of the larger Gassendi contrasted nicely with
respect to depth.
Shallower and smaller Gassendi B was just north-north-west of A. The rough
highlands around Rimae Mersenius were visible to the west of these three craters
and low hills in the Herigonius region could be seen to the east of Gassendi. Mare
Humorum is estimated to be 3.9 billion years old and Gassendi perhaps 100 million
years younger. If Apollo 17 planners had chosen Gassendi as the last lunar landing
site we would likely know the ages today.
Sketching
For this sketch I used: black Strathmore 400 Artagain paper, 9”x12”, white and
black Conte’ pastel pencils and a blending stump. Brightness was slightly
decreased after scanning.
Telescope: 10 inch f/ 5.7 Dobsonian 6mm eyepiece 241x
Date: 9-23-2007 2:05-3:15 UT
Temperature: 17°C (62°F)
Clear, calm
Seeing: Antoniadi II
Co longitude: 47.5°
Lunation: 11.6 days
Illumination: 82.7 %
Frank McCabe
Category: Media Combinations
A Capacity for Opacity
2007 08 26, 1700-1928 UT
PCW Memorial Observatory, Zanesville, Ohio
Equipment used:
Internally Double stacked Maxscope 60mm, WO Binoviewers, 20mm WO EP’s, LXD75.
Meade ETX70-AT, 21-7mm Zhumell, glass white light filter.
Seeing above average with only a few moments of quivering, transparency above average.
Temps 80.1 °F / 26.7 °C to 78.1 °F / 25.6 °C over course of observation.
Winds 4.6 mph – 6.9mph NNE/ 11.1 km/h.
Clear progressing to mostly cloudy by the end of the session.
Humidity 54%
Sketching media: The white light sketch was done on copy paper with a number 2 pencil.
The Ha sketch color sketch was done using black strathmore paper with color Prang pencils.
Word for the day: Opacity
According to my heavy, red, weathered Merriam-Webster’s Collegiate Dictionary (tenth
edition), opacity is defined as:
“n, .1: the quality or state of a body that makes it impervious to the rays of
light; broadly: the relative capacity of matter to obstruct the transmission of
radiant energy..2b: the quality or state of being mentally obtuse: Dullness.”
I kind of got a kick out this. It appears that with one word, I can attempt to
discuss opacity of the Sun and yet at the same time try not to create opacity while
doing it.
Studying the Sun, as well as anything worthwhile, can be very confusing and
sometimes overwhelming. It helps to understand the basics such as knowing that the
Sun is a giant ball of gas. It has several layers starting at the inner most called
the core. The majority of the Sun’s core consists of hydrogen. By nuclear fusion,
the hydrogen is converted into helium. The key here is that in doing so, energy is
created. Energy equals heat. All in all, when we think of the Sun, we think of
radiation, or electromagnetic radiation to be more specific. Radiation is a process
that transports energy. Electromagnetic radiation is a radiation that carries
energy through empty space by means of waves at the speed of light.
You see, atomic particles (created by the nuclear reactions in the core) speed up
and grow from the exchange of varying flows of electrical and magnetic fields, which
is where electromagnetic radiation originates. Following me so far? Here’s where I
start to get back on topic. Electromagnetic radiation has both wavelength and
frequency. When you multiply the two together, you get the velocity of light. If
one of the variables increases, the other has to decrease for the velocity of light
to stay constant.
Oh, how easily it would be to dive in further with all this. But I need to stay on
track with the first definition of opacity. Wavelengths are compiled in what we
call a spectrum. And this is when we get into means possible for us to view the
Sun.
Imagine the energy being transported through a few more layers of the Sun, each
layer quite a bit hotter than the previous as it extends away from the core. We
finally reach the layer that most call the “surface” of the Sun, the Photosphere.
Does that look Greek to you? Well, not to worry. It is Greek. The Greek word
“phot” stands for light and “sphere” of course stands for round ball.
In the photosphere, the gas is heated so much that it burns bright giving off most
of its energy close to the middle of the spectrum, creating visible light. And it
doesn’t end there. Reaching out from that thin layer of burning gas is the
chromosphere, meaning round ball of color. After a brief pass through the
transition region, the energy enters the corona and then outwards as solar wind.
Each layer is visible through specialized means. Each layer involves our word for
the day, opacity.
One evening, quite a few years back, my brother in law and I were cooking supper
together. I was in charge of the chip pan and cutting up the potatoes. I could see
him very clearly across the room and the air was transparent and had a zero optical
thickness.
As we were talking to each other from different ends of the kitchen, we soon noticed
that we were getting harder for the other to see. In other words, the optical
thickness was getting thicker. By the time we became alarmed to this fact, the
smoke was nearly opaque with an optical thickness of close to 9. I could hardly see
him anymore. As he walked toward me, I could see him more clearly and by the time
he reached me the optical thickness was perhaps a 3.
We removed the smoking chip pan that caused the smoke from the stove, opened the
kitchen windows, grabbed the dog and a bottle of wine, and sat out on the steps of
the flat, watching the smoke roll out of the kitchen window. I don’t recall what we
ever did for supper that night, but I suppose that’s beside the point. It was a
perfect example of opacity and how I measured it. The same is done when viewing the
Sun.
The further into the Sun we look, the higher the opacity. We can only see up to
approximately an optical thickness of between 0.5 and 2. The photosphere is said to
have an optical thickness range of close to 3/4, and it includes all the light that
we can muster from the Sun, meaning white light. If I wanted to view through a
narrowband filter such as a hydrogen alpha filter, the optimal optical thickness
would be reached before I even gazed into the Sun as far as the photosphere. I
would in fact start at the Chromosphere. This is wonderful news for us in that by
using special filters, it changes the opacity from a zero to us being able to
actually see the color of the light in this layer of gas, blocking out all the other
colors that would have hidden this color otherwise.
Well now, I’ve come full circle with opacity! And what does this have to do with my
observations today? Well everything to be honest. Opacity is what strives us to
find new filters for trying to tease out as much detail as we can. And there’s
information to be had if we can look at different layers of the sun. In my
observations today, I viewed in both the photosphere and the chromosphere. Two
different gas layers with a temperature difference of over 4000 degrees Kelvin
(chromosphere at 10,000 K and photosphere at 5780 K). Each will allow us to see
slightly different details on the Sun and each are important to consider while
studying it.
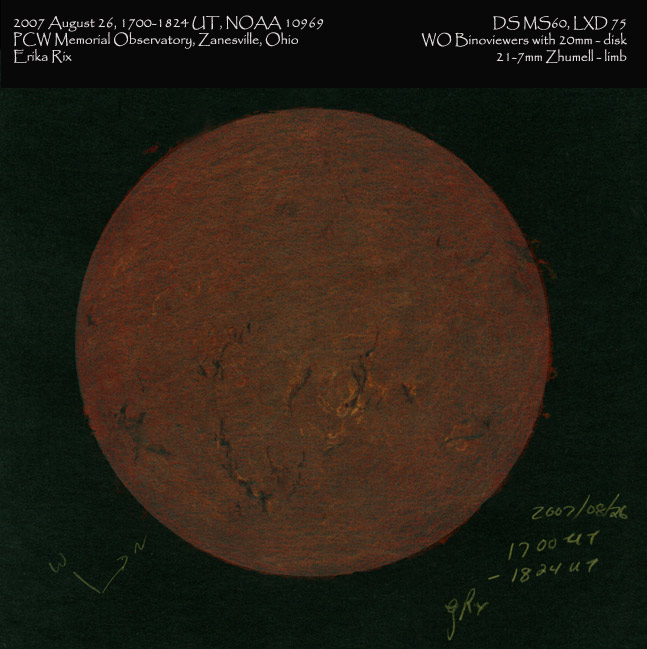
This first observation was recorded in hydrogen alpha. You can see the effects of
the magnetic fields through the long fingers of the filaments holding the cooled
dense gas in place. Although this observation is mainly in the chromosphere and
lower parts of the corona, the filaments are generally held in place by regions of
opposing magnetic polarity within the photosphere. Of course this is also the case
for the prominences, as prominences are filaments above the limb where the gas is
set in front of the black sky instead of the disk. Although the filaments were very
impressive on the disk itself, they were not so impressive on the limb today.
Having said that, take a look at the faint section of prominence that appears to be
floating off the limb in the WNW region.
NOAA 10969’s plage intertwined and reached out with crooked fingers.
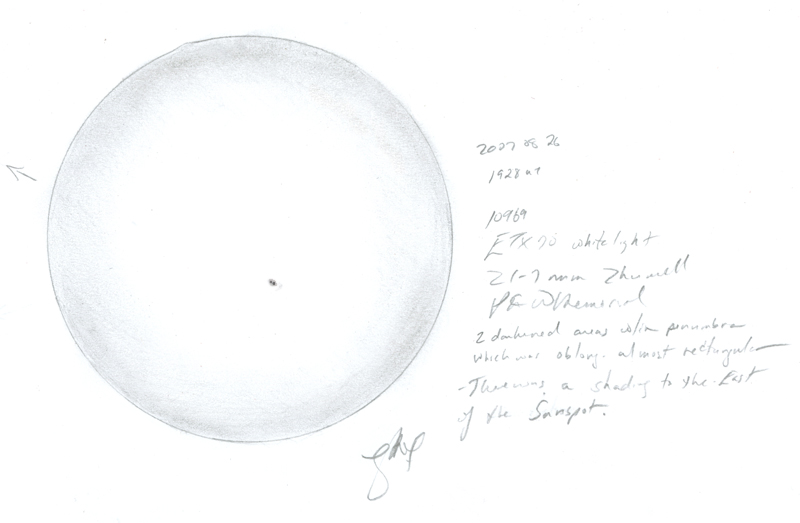
The next observation was using a white light filter where over 99.999% of the Sun’s
light is blocked out, making it possible for me to view the photosphere. This is
called white light. You can see NOAA 10969 in the cooler layer. The chromosphere
becomes invisible to me again. The two dark sections of umbrae within the penumbra
of this action region were very prominent. I could see a darkened outline of the
penumbra and it had an almost rectangular shape with curved corners. Of particular
interest was the very faint darkened area to the right of the sunspot. This happens
to me fairly often, seeing little bonus features like this. I’m still not sure what
causes it. Normally I would think it was contrast from faculae that I was unable to
discern. Normally we can only see faculae closer to the darker limb regions. But
often I can see an outline of contrast suggesting faculae present when the active
region is toward the center of the disk.
This time it is a little different. If I didn’t know any better, it looked like a
thick triangular cooler region next to the sunspot. By this I mean cooler than the
photosphere, hotter than the umbra, and only just slightly hotter than the
penumbrae.
With so much to learn concerning the sun, at least we learned one new word. It’s a
start in the right direction anyway.
Erika Rix
Lunar eclipse duet
I had wonderfully clear weather the morning of August 28th, 2007 and was able to create a sequence of sketches of the total lunar eclipse for the ingress side of the event. Unfortunately the Eucalyptus grove in the west blocked my attempt to sketch the egress. Erika Rix graciously offered to animate this sequence for me, thank you so much Erika, you did such a wonderful job! I hope you all had a chance to witness this one, it was an awesome and colorful event.
Telescope:12″ SCT f/10
Eyepiece: 35mm Televue Panaoptic
Magnification: 87X
Medium: white Conte’ Crayon and colored pastels on black 400 series Artagain paper
Richard Handy – Sketches
Erika Rix- Animation
Classic Southern Moonscape
Craters Clavius and Blancanus
Among the large craters of the lunar southern highlands, two nearly 4 billions old
impacts stood out on this morning before my local sunrise. These craters are 225
km.diameter Clavius and smaller 109 km. Blancanus. Clavius is not only old and
large but is blanketed with numerous craters and craterlets. At the center of this
large crater are the reduced remains of once regal central peaks. The atmosphere
was steady enough to pick out cratelets less than 1.5 km in diameter during
periods of excellent seeing. Crater Clavius is famous for its semicircular crater
sequence of decreasing size beginning with 49 km. Rutherfurd at the inner
southeastern wall and continuing with 27km. D, 20 km. C, 12 km N, 11.3 km J and
7.5 km JA. The north-northeastern rim of Clavius has a large crater resting it.
This 52 km. diameter crater is Porter. A broad crater ray was clearly visible
crossing the floor of Clavius just to the west of Porter and Clavius C. Much of
the floor of crater Clavius
remains smooth which implies the flow of melted rock in the past. Some geologists
speculate it is from the ejecta of the Orientale basin. Some small secondary crater
chains point back in that direction.
Sketching:
For this sketch I used: black Strathmore 400 Artagain paper, 9”x12”, white and
black Conte’
pastel pencils and a blending stump. Brightness was slightly decreased after
scanning.
Telescope: 10 inch f/ 5.7 Dobsonian and 6mm eyepiece 241x
Date: 9-2-2007 8:15-9:25 UT
Temperature: 17°C (62°F)
Clear, calm
Seeing: Antoniadi II-III
Co longitude: 53.9°
Lunation: 20.39 days
Illumination: 70 %
Frank McCabe
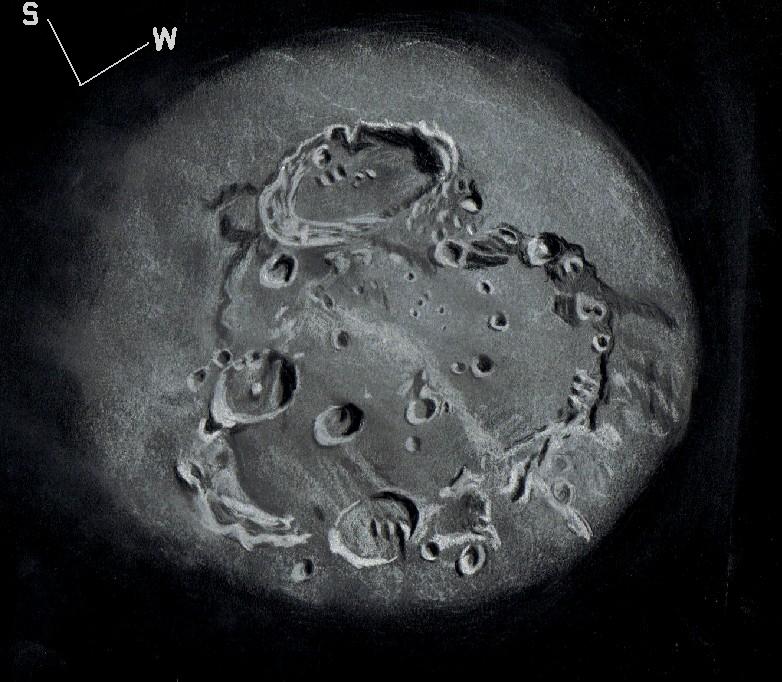
From Sirsalis to Damoiseau
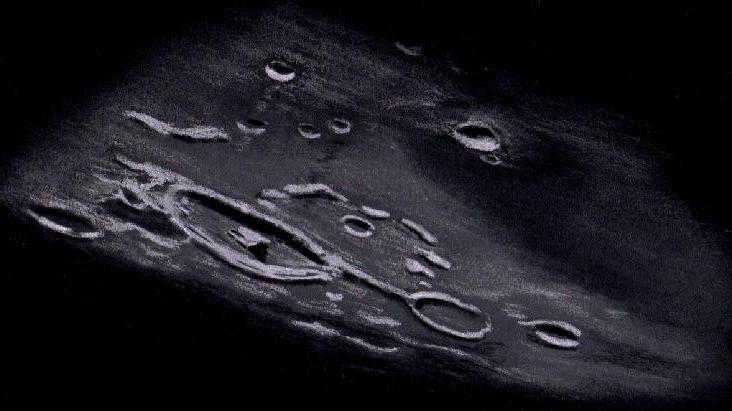
This was the first time that I had used my new (to me) Superscopes 6″ F9 triplet
refractor for a sketch. As per usual I sketch what my eye is most drawn to and
then research the area after.
In this case I struggled to match up the craters that I had captured with any of
my many books & atlases. In the end I got a best match from an excellent free
down load picture Atlas/portfolio by Alan Chu. I decided that it must be the
Sirsalis region although the stunning illumination I enjoyed wasn’t captured in
any thing that I had in my library.
I used the following:
Superscopes 150mm F9 triplet refractor, Denk binoviewer with 2.5x lens, 2x 23mm
Celestron Axiom eyepieces straight through so no diagonal delivering 146x.
6″x8″ (150mm x 200mm) light black card of unknown origin
Derwent watercolour pencils, Derwent pastel pencils, conte sticks & blending stumps
25.8.07, 21.30UT sketch time 10minutes.
Location: Chippingdale observatory, Chipping Nr Buntingford, Hertfordshire, England.
Dale Holt
Whirlpool in space
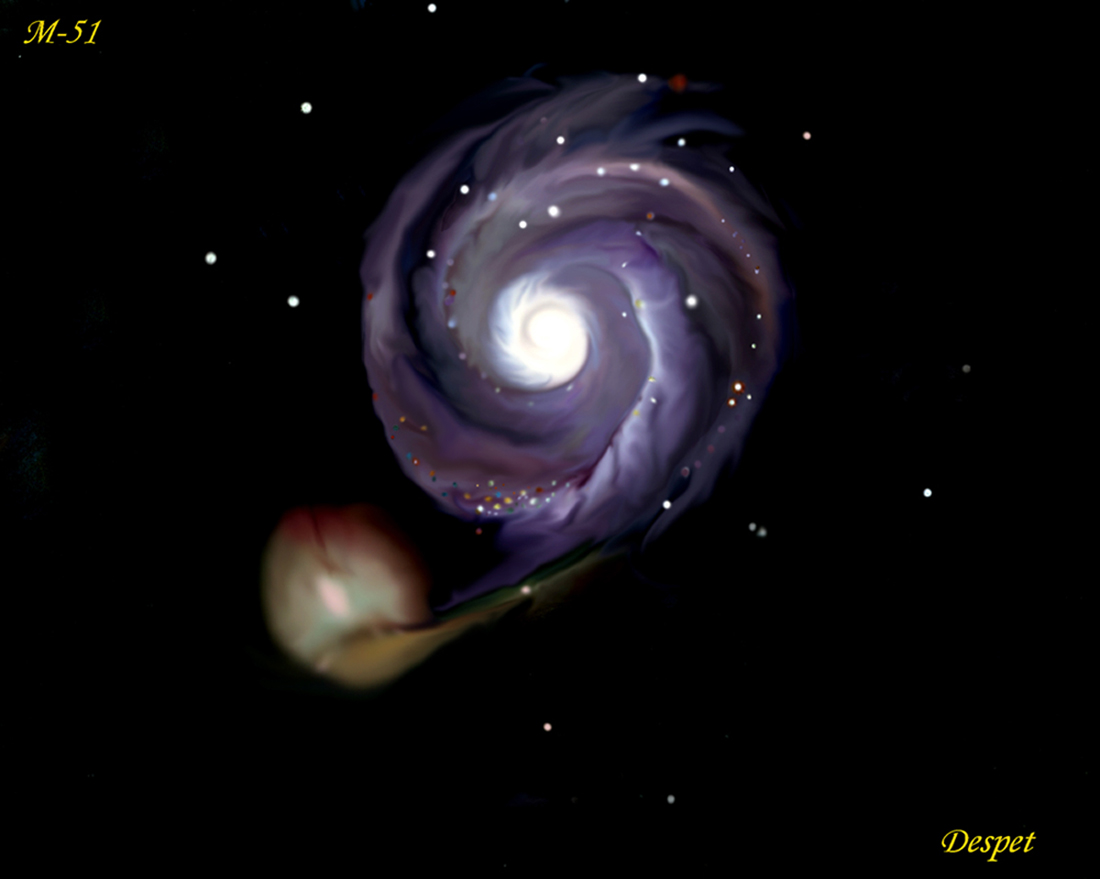
The Spiral Galaxy M51 (NGC 5194) in Canes Venatici
For the amateur M51 is easy and a showpiece if the sky is dark, but is quite
sensitive for light pollution which easily makes it fade in the background. Under
very good conditions, even suggestions of its spiral arms can be glanced with
telescopes starting from 4-inch. Low magnification is best for viewing this pair
Right Ascension:13 : 29.9 (h:m)
Declination: +47 : 12 (deg:m)
Distance: 37000 (kly)
Apparent Dimension:11×7 (arc min)
Sketch was made large on A4 black cartridge paper using white and colored pastels
and pencils after viewing an astrophotograph…
The sketch was then scanned and processed in Photoshop cs.
All the Best from Athens,
Peter
Out of darkness into the light
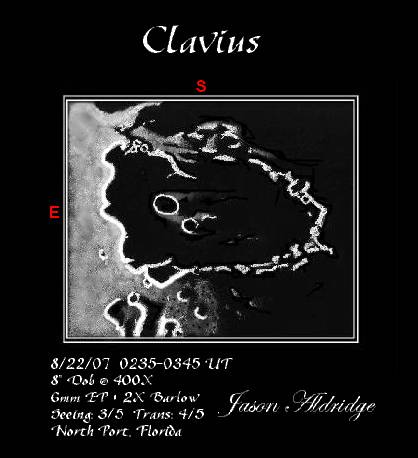
When I spied the glowing rims floating in a pool of pitch, I knew it was time that I
tried to render a lunar sketch with white pastel on black paper. I felt quite clumsy
while drawing Clavius with this foreign medium, but in the end I decided that the
result was acceptable. I know that I will require a good deal of practice before I
am comfortable sketching in this manner. Kudos to those of you who make such
wonderful lunar sketches in white on black!!! I hope you all enjoy my first attempt
at sketching with new tools.
Jason Aldridge
North Port, FL
Under a waxing gibbous Moon
10 Day Old Moon
I decided before dark that this was the night to try a whole moon sketch again.
August has been cloudy and rainy since the beginning of the month. It was clear
before sunset, but clouds and rain were due in by 10 pm local time. I attempted
this type of drawing at the beginning of the year and I was unhappy with the
result. The drawing at that time was too small and I rushed it. This time I
proceeded in a similar manner but I made the drawing larger and took my time. I
also re-read chapter one in Astronomical Sketching by Richard Handy, David Moody,
Jeremy Perez, Erika Rix and Sol Robbins before I started. Rich and Erika wrote
this chapter. I did this to make sure I didn’t forget something important. To make
this sketch I needed a small scope so I used the finder scope of my 18” which
doubles as a 4.25” f / 5 Dobsonian. Some of my favorite views of the moon have
occurred using telescopes of this aperture and smaller.
Sketching:
For this sketch I used: black Strathmore 400 Artagain paper, white and black Conte’
pastel pencils and a blending stump and my index finger too. Brightness was
slightly adjusted after scanning.
Telescope: 4.25 inch f/ 5 Dobsonian and 21mm eyepiece 26x
Date: 8-23-2007 0:45-2:40 UT
Temperature: 30° C (86° F)
Partly cloudy, calm
Seeing: Antoniadi III
Colongitude: 27.9 °
Lunation: 10 days
Illumination: 69.4 %
Frank McCabe
Pythagoras on the Moon
It was approaching the time for sunset and Venus was not visible in the west through the clouds. To the southeast the glow of the moon behind the clouds and haze was just visible and it was not shaping up very well for an observing night. As twilight ended and the moon continued rising, it began to look like an observing session could happen. The moon was yellow-orange in color through the haze and not quite 25° above the southern horizon when I began to sketch Pythagoras crater at the northern terminator region. Although the transparency was so poor 3rd magnitude stars were not visible overhead, the seeing was above average. Along the terminator 130 km. crater Pythagoras with its twin tall central peaks and brightly illuminated, terraced northwestern wall was nicely visible. Hugging the southern wall of Pythagoras, slightly larger Babbage (140 km.) with its crumbled walls and large central crater Babbage A shared the spotlight near the dark lavas of Mare Frigoris. Following the west wall of Babbage to the south the 70 km. crater Oenopides stood out with its relatively smooth looking flat floor. And finally standing somewhat alone in the dark lavas is rayed crater Harpalus (41 km.) the youngest of the named craters in the sketch.
Sketching:
For this sketch I used: black Strathmore 400 Artagain paper, white and black Conte’
pastel pencils and a blending stump. Contrast was slightly increased after scanning.
Telescope: 10 inch f/ 5.7 Dobsonian and 9 mm eyepiece 161X
Date: 5-30-2007 2:42-3:30 UT
Temperature: 24° C (75° F)
Partly cloudy with much haze, calm
Seeing: Antoniadi II-III
Colongitude 70.4 °
Lunation 13.3 days
Illumination 97 %
Frank McCabe
Prom Dance
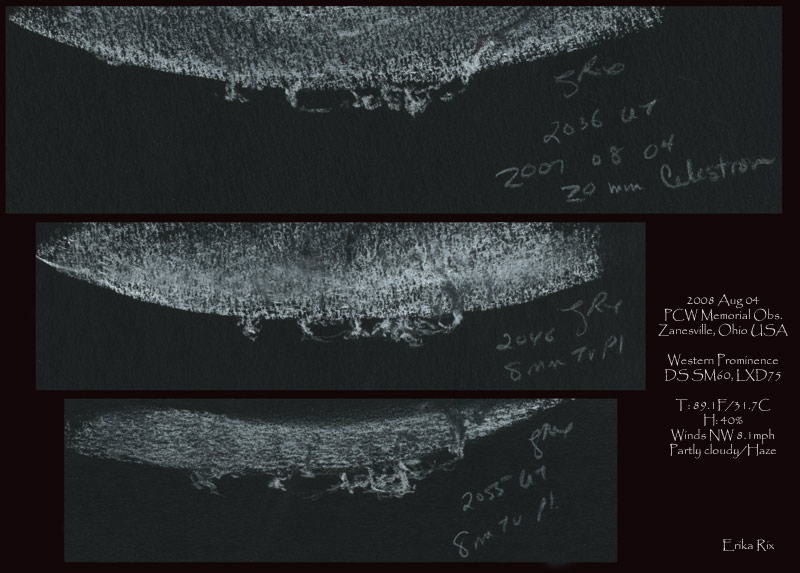
Western prominence sequence and animation
I used the normal black Strathmore Artagain with a combination of Prang white
pencil, Conte’ white pencil and Conte’ crayon.
The Prang is waxy, more precise, and lighter markings. The Conte’ pencil is very
white heavy markings, but not as precise.
I’ve made a little animation to go with it.
http://www.sflorg.com/member_gallery/solar_images/20070804_animation
Erika Rix
Zanesville, Ohio USA

